Pages

Wednesday, May 30, 2018

Coffee Blessings

Welcome

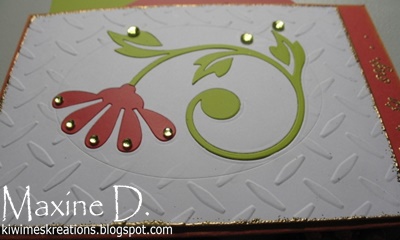
I have been wanting to give some encouragement to someone going through a difficult time.  The Coffee Lovers Blog hop is the ideal time, as they love their coffee!


I deliberately kept it CAS as they are not 'fluffy' people. 


The two stamps above are from the  STAMPlorations Anywhere There's Coffee set.  The image was stamped with Memento Rich Coffee ink, and the sentiment with Ranger Espresso, and shaded with my Polychromos


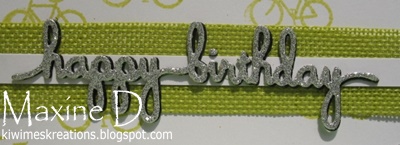
The sentiment (also from STAMPlorations) was die cut in gold card, and on the card base, and the gold inserted into the base.

The white layer was then added to a soft brown card base, and both layers were edged in black ink to give some definition.


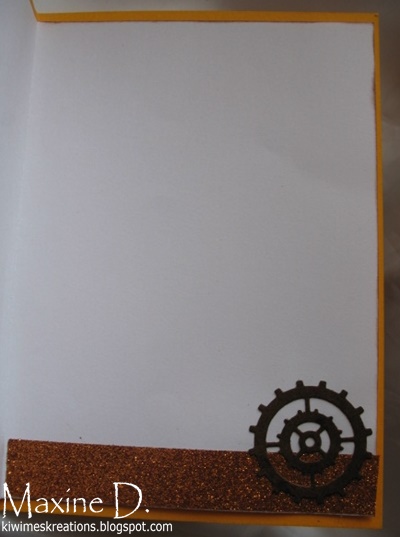
I stamped the ODBD Scripture Verse in Espresso in the left of the insert inside the card.

I am linking this to:


Monday, May 28, 2018

Cats, Banners and a Birthday

Welcome

I have been really enjoying the the Tim Holtz Crazy Cats over the past few months, and this is another of those cards :-)


I started with some paper from my "promise basket" (I promise I will use it one day) and hand cut the banners from scraps /snipetts, sponging the edges with Memento Danube Blue ink.


I stamped, trimmed, sponged and mounted the sentiment over the banners on some foam. 


This fellow was coloured with chalks, in a similar colour to my cat


especially the brown/gold eyes, which were emphasised with Glossy Accents


I stamped another cat image on the inside in London Fog ink, and gave him green shiny eyes.

I am linking this to:


Friday, May 25, 2018

Top Hat Balloon..

Welcome

It seems to be a recurring theme recently, but I have been MIA again - this time looking after grandies whilst their parents were away.  My hat goes off to solo parents, especially grandparents caring for grand children... I came home exhausted after a few days!!

Thankfully I have some cards that I have not yet blogged, so I thought I would share this one.


I love the Steampunk images from Darkroom Door, and this is a combination of two stamps from the steam punk set.  I like how quirky you can make a steampunk card, so stamped the balloon balanced on the man's top hat. 

 
I trimmed down the focal point and sentiment panels and 'framed' them by layering them on dark brown patterned paper, then mounted the main image over corrugated card, hand cut to form a banner.


I then die cut various cogs in card stock, and inked them with Espresso ink to match the pp.


I finished the inside of the card with a strip of sparkle copper tape and another cog.


I am linking this to:


Monday, May 14, 2018

Hazards Ahead - Construction Zone

Welcome

This was made for a young boy for his 5th birthday


The stamps were from a set by FLONZcraft called toy trucks. They are just the right size to make a 'scene' with


I stamped the images in Espresso Ink, coloured with (basic water colour) markers, and then fussy cut each image.  The rocks were 'made' using a textured paste mixed with dark brown acrylic paint and scraped through a bubble stencil!  Espresso ink was then stippled between the 'rocks'. 
They are really very textural to touch.


There was glitter paper used for the digit and the layered circle


The sentiment, one of my original stamps probably 15 years old, was stamped in blue and coloured with twinkling H2O paint, which was used for the 'sky', and then fussy cut an placed on the background.


The final stamp was used on the left hand side of the inside of the card - you can see from this how I trimmed out the digger image from this one.


I was just about finished when Tinker lived up to his name and photo-bombed the session!

I am linking this to:


Friday, May 11, 2018

6 H's and a Butterfly

Welcome

It was a cloudy and cooler day today so I took the opportunity to 'play' in my studio.  
I was fascinated by Mrs A's Butterfly Challenge this round, so made this card to fit!

This is my result, which I might add, I am rather pleased with...


I stippled the Viva Harvest Gold paint through a Honey Bee Layering background stencil onto the Hunter Green card, and used the same card to heat emboss the sentiment on.


The hearts (an unidentified die)  and butterfly,( by Memory box) were die cut from Hot Pink, then painted with a hot pink Mica based paint that dried lighter :(.


I cut the background into a large hexagon (that was quite a challenge for this geometry challenged oldie), layered that over a glitter card stock before adhering it to the white base.

To finish I added the stripes down the spine of the card, and a touch of gold under the sentiment before adding the die cuts and the hot pink rhinestones for the butterfly's flight path and body.

I am linking this to:

(I used all seven elements)


Wednesday, May 9, 2018

Tulip Border

Welcome

Although we are going into winter here in the Antipodes, I am about to plant my new tulip bulbs, and hopefully in a few months I will have a border of blooms like this!


This is a tri-fold card, with the die cut attached to the left hand side of the card and swinging out to reveal the background, before the main part of the card is opened from the left to reveal the inside of the card.

The die cut was cut with an Intri-cuts die by Couture Creations - sorely under used, and here painted using water colour crayons, also an underused resource.


The sky was created using a hand cut stencil and sponging, and the sentiment was gold embossed.  The stamp is one of my originals, bought from a chain store of  'el-cheapo' goods, some 12 or more years ago!


This is the full panel - with just a touch of green at the base to go behind the floral border


I am linking this to:

(The sentiment stamp is over 12 years old)


Monday, May 7, 2018

Birthday Bicycle(s)

Welcome

I made this card for my grandson who was turning six, and receiving a new green bike for his birthday!!


The background was stamped randomly using an image from a (now retired) Hero Arts stamp set of bicycles in Memento Pear Tart ink 


The sentiment (by Spellbinders) was cut three times, once in white, once in dark green and once in silver glitter paper, and they were stacked in that order, with the silver slightly off set to give a shadow effect. this was mounted on white card over green burlap ribbon. 


The die cut digit, by Kaisercraft was stacked in the same manner.

Part of his gift was hidden in this tin, which I cut the bottom part out of, filled with wee gifts, sealed with hot glue and then decorated.


I am linking the card to:


Friday, May 4, 2018

Paint Chip Flower

Welcome

I had fun with paint chips when I made this flower - The colours I used were Red Alert and Lime Leaf - both British Paints brands.


I embossed the background using the 'fade' technique, and also emphasised the blank by outlining it with an embossed oval


The flower was die cut in the two colours (the chips are quite large) and then inlaid it into the background


There were a couple of  'oops' in that process, plus a wee dab of colour where it should not have been, so what better than some rhinestones to do a cover-up job and embellish?


The edges of the feature panel and the sentiment were (heat) embossed in gold.

I am linking this to: