Pages

Monday, March 31, 2014

Red Roses

Welcome

I recently bought a magazine with this stamp from Visible Image as a freebie with it.  I pondered how to use it for a while, and came up with this card.


I stamped the rose three times, masking as I went, and then coloured them with chalk - I was not happy with the outcome, so stamped another rose, fussy cut it and mounted it with foam dots over the front rose in the original grouping, and added some clear KindyGlitz.


The background behind the images was coloured with chalk, and the panel was mounted over some burlap for contrasting texture.


A sentiment was stamped and a ribbon tag cut around it, with some sponging done before the die was removed.


The final detail was a ribbon bow, that wanted to turn itself inside out as I fought it to keep the spotted side to the front!

I am linking this to:

Thank you for visiting - any comments you may leave are deeply appreciated
May your day be blessed

Friday, March 28, 2014

Time for Tea

Welcome

I bought some Elizabeth Craft dies recently, and just had to try them out.


After cutting the images out in blue card I glued them onto a scrap of dp and fussy cut around them. 


The features on the die cuts I filled in with a gold pen.


The die cuts were mounted onto a thin yellow card that I had embossed with the Swiss dots folder, above a piece of ribbon and lace, which gives the impression of a tablecloth. 


The 'curtain', was made with four strips of ribbon adhered to the top of the card, and then caught in the corner with some pearle thread, and with a rhinestone to accent it.

The whole was then mounted onto white card base, that I had sponged the edges of with blue ink.

I am linking this to:

Thank you for visiting - any comments you leave are deeply appreciated
May your day be blessed


Tuesday, March 25, 2014

Pink Dreams


Welcome

I had fun with this card - starting with the watercolour panel


The sentiment was embossed in white before the panel was trimmed, the corners punched, and it was mounted over a piece of black sparkle card.


The bling swirl was added, and then some butterflies punched from the black sparkle card.


After mounting on the pink card base, A ribbon was added to the left of the card, and a bow folded onto it.


The final touch was some bling on the ribbon.

I am linking this to:

Thank you for visiting - any comments you may leave are deeply appreciated.
May your day be blessed.

Sunday, March 23, 2014

Leaves

Welcome

 I was inspired to make this masculine card from a combination of various cards on Pinterest using inchies. There are also elements from a technique in a magazine I recently read.


 I started with the inchies, blotting them onto a distress ink pad for background colour, then overstamping them with small leaves, also in distress inks.


They were mounted onto the dark brown card to frame them, and adhered to the card with foam squares for a hint of dimension.


I stamped the sentiment in dark brown ink and clear embossed it.

The final detail were the two groups of three scored lines.

I am linking this to:

Thank you for visiting, any comments you may leave are deeply appreciated
May your day be blessed

Thursday, March 20, 2014

Chalk Patchwork

Welcome

I have seen a couple of challenges recently which contributed to this card's design - and the interests of the recipient also added to the mix.


I have a new hexagon die which I used to emboss the design into the card


I then used the die as a stencil to add the colour with chalks/pastels. 


 To emphasise the ones I left white, I added a wee bit of faux stitching.


The card was finished with a simple embossed sentiment, some faux stitching to form a border, and the corners on the white layer were rounded before being mounted onto a red base.

I am linking this to:

Thank you for visiting - any comments you may leave are deeply appreciated
May your day be blessed


Monday, March 17, 2014

Baby Rattle Welcome

Welcome
I  wanted to make a baby card for a young couple who recently had a baby girl - they are not 'pink and frilly folk' when it comes to their daughter(s), so this unconventionally coloured, rattle shaped card was the result.


I CASE'd this card made by my bloggy  friend Bridget - she was pleased when I asked if I could copy the concept.


The image is one from Clearly Vintage that I sized to fit, printed and cut with a Spellbinders Oval die.  It was mounted onto a Floral Oval Spellbinders die cut that I had sponged with Victorian Velvet distress ink.


The bow was tied onto the shank of the rattle - it is a double sided ribbon, but I managed to get it to do what I wanted and keep the pink side outermost throughout.


The base of the card is cur from the second smallest die in the floral ovals set, and sponged with the same ink.


This is the card opened - I cut a pair of ovals with one edge just inside the die to form a hinge.  The handle of the rattle was gently curved using a saucer for a guide, and then sponged.


Thank you for visiting - any comments you may leave are deeply appreciated
May your day be blessed

Saturday, March 15, 2014

Fisherman

Welcome.

I wanted to make a card for an avid fisher, and was so pleased I had recently bought this stamp.


I painted the image with watercolours - I added the black to the shirt to give the impression of checks, as the recipient frequently wears checked shirts.


After running the darker gelato around the edge of the image panel 
I mounted it to one side of the textured panel I had made on the white layer.


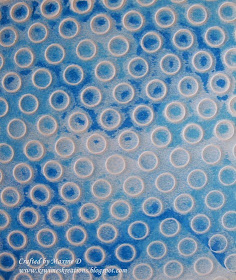
This layer was made by embossing a die , then rubbing over two tones of blue gelatos and blending them with my finger.


I stamped the greeting by electric light, and thought I had matched the blue ink with the gelato - I discovered the next day that it was not so, which reinforces my resolve never to try and match colours in anything but daylight!

I am linking this to:

Thank you for visiting - any comments left are deeply appreciated.
May your day be blessed

Thursday, March 13, 2014

Crooked Edged Silk Moth Card

Welcome

I wanted to make a 'different' card when teaching this week, and saw this cut back edge technique and adapted it to 'fit' my stamp.


The image (Silk Moth by Layers of Color, now retired) was stamped in Sahara Sand Chalk ink by Tsukineko, coloured with chalks, and highlighted with a gold pen and some Kindy Glitz.


Next the right side of the card was trimmed back to the edge of the wing of the moth, and then across from the wing tip to the fold.


The inside of the card was lined with a plain paper, and then a flower was popped onto the inner edge at the top of the card.  This was made using the second Itty Bitty Flower die by Spellbinders, and sponged with Crushed Velvet ink before being rolled.  The leaves were from the same set and sponged with Bundled Sage ink before the die was removed. 

Some Kindy Glitz on the flower and a few sequins finished the card.

I am linking this to:
Through The Craft Room Door - Anything Goes
Scrap Creations - Pastels
Penny's Challenges #168 - Anything Goes
Little Red Wagon Challenge #228 - Dimensional (the flower)
Crafting By Design - Things With Wings
Crafting for All Seasons challenge #73 - Spring into Spring
The Crafter's Cafe Challenge #54 - Flowers
Addicted to Stamps Challenge #86 - Anything Goes
Word Art Wednesday Challenge #123 - Anything Goes

Thank you for visiting - any comments you leave are deeply appreciated.
May your day be blessed.


Monday, March 10, 2014

Teddy Bear's Picnic

Welcome,
When I was young I learnt to play the song "The Teddy Bear's Picnic", and I thought of that when making this card with a very special young boy in mind.


The image is a free digi from Designed 2 Delight (now From The Heart Stamps) that I downloaded some time ago.  He was coloured with chalks.


I decided to keep the mounting simple so the focus stays on the image, so went for an off set squares design - I added a faux stitched border to both squares.


The dp, although a bright green does not overwhelm the image, but makes for a cheerful card, especially with the contrasting red card base.

  The finishing details were the sentiment and some clear rhinestones.

I am linking this to:
Thank you for visiting - any comments left are deeply appreciated.
May your day be blessed

Friday, March 7, 2014

Pink Thanks

Welcome

As you know I have been away helping family.
 I am home now, and made this card to thank our wonderful neighbours for delivering baking to DH on several occasions.


I started with the vintage image of the Asters from The Digital Two for Tuesday  blog, thank you Cora, and coloured them with chalks.


I placed the flower panel over a layer made by fusing a paper napkin onto card with plastic film.  The napkin was one that had borne some muffins over the fence for DH. :-)


To the left of the panel was a layer of lace.


The sentiment is from Montago Stamps, a New Zealand firm, and I embossed it in white onto the pink base.  
A few pearls finished the card which was delivered almost as soon as I had photographed it, and it was received with great delight.


Thank you for visiting - any comments you may leave are deeply appreciated.
May your day be blessed

Tuesday, March 4, 2014

Artsy Masculine Card

Welcome

I needed a masculine card in a hurry the other day, and this is the result.


I started by splattering the card base with brown water colour paint.


I added the washi tape in alternating layers.


I embossed the Hero Arts Little Happy Birthday sentiment in gold, and then cut it out with a small, fancy square die set on the angle, and ran a gold pen around the inside of the die before removing it.

I placed it on the intersection of the washi tape and called the card complete.


Thank you for visiting - any comments you may leave are deeply appreciated
May your day be blessed

Monday, March 3, 2014

Monochrome Silver

Welcome

I am currently visiting (sick) family - Grandma to the rescue, as we do!

This was made recently for a wedding anniversary, for a couple who are pretty 'no fuss' people


The base stamp is from Hero Arts - Fine Woven Fabric - a stamp that I have had 'forever' and never used to its potential. I embossed it using detail silver embossing powder.


Washi tape was layered over that, before the next details were added.

The two small hearts were stamped so they overlapped, embossed, fussy cut, and mounted on foam dots.

The sentiment was embossed, the tag trimmed and the corners rounded, then the edges were also embossed, again mounted on foam dots.


This image shows the wonderful sheen of the silver embossing.


Thank you for visiting - any comments you may leave are deeply appreciated
May your day be blessed