Pages

Tuesday, August 30, 2016

Baa Baa Black Sheep

Welcome

This card was designed for a two year old's birthday - the wee lad lives on a farm, and hopefully he will like the card.


I started by stamping and masking the sentiment, the two featured sheep, then continued with the rest of the flock, masking as I went. 
(The stamp appears to have been discontinued)


The sheep were coloured using prismacolor pencils, using small circles to mimic the wool.  I did not colour the faces of the black sheep, (other than the nose) just letting the kraft card show through.


I painted in the embossed sentiment with Inca Gold gold paste, applied with a wet paint brush.


this photograph shows the gleam it has.


I finished the inside of the card by stamping two sheep inside.

i am linking this to:

Thank you for taking time to visit my blog - may your day be blessed
Any comments you may leave are deeply appreciated
All comment are moderated and spam deleted.

Friday, August 26, 2016

Mini Scripture Cards

Welcome

When I have no specific cards to make, I often sit down and make wee cards for distribution at church for birthdays and other occasions.  I use my scraps and old business cards as a base.


This card was made using some paper from my desk that had picked up inks, and onto that mounted an embossed verse and a tiny scrap of patterned paper to finish.


The base of this was an off cut from a failed card, with the scripture stamped and some pearls added.


Same card scrap, but star brads added to the glitter strip this time.


The background on this is cut from paper that was in my spray box, some washi tape across the base, some pearls, and die cut that didn't 'work' when originally cut, and the scripture stamped and die cut on top of that.


Dark green stamping on green designer paper, washi tape and enamel dots came together on this card.


Two patterned papers, a stamped scripture, stars and some gold cord completed this one.


Gold embossing on die cut and sponged paper, two patterned papers and some rhinestones on this more colourful card.

I am linking these to:

Thank you for taking the time to visit my blog - may your day be blessed
Any comments you may leave are deeply appreciated
All comments are moderated and spam deleted.

Wednesday, August 24, 2016

Five Minute Wonder

Welcome

i would like to extend a warm welcome to Liz - aka The Lace Bee who is following me on Bloglovin'. 

It's not often I 'see' a card, and what I make matches it exactly - but it happened this time!!

When I saw this quote on Ginger's blog on Saturday, I knew I wanted use it to make a card for my daughter, as she was away with her two best friends for a 'girlie weekend', and work for her on Monday would be such a contrast.


I simply printed off the words, trimmed the card to size, and embossed top and bottom with the Lawn Fawn  Stitched Borders, using the cross stitch die.


Adhered the two layers, and it was finished - my daughter loved it, and her work mates were envious.

I am linking this to:

(Faux Cross Stitch)

Thank you for taking the time to visit my blog - may your day be blessed
Any comments you may leave are deeply appreciated
All comments are moderated and spam deleted


Sunday, August 21, 2016

Hope and a Bookmark

Welcome

Firstly I would like to extend a warm welcome to Megan J  of  My Merry Card Corner, who has started following me - her work is gorgeous, please pop over and visit her!!

I wanted  to make a card for an older woman (no, not me... ), I had all afternoon, and I had hoped to make a couple of cards, this one did not co-operate, and it was all that I got done.


I had already decided to make a card with a bookmark attached, and I wanted to use these stamps from the ODBD Grace's Hope set.


I cut the bookmark to size, sprayed it with Magicals Spray, Blue Hawaian Blue, then stamped and embossed it with gold, and added the gold, die cut corners.


Here you can see the shimmer from the spray, and the gold splatters that I added later.


To finish the card I die cut and stenciled, then sprayed three s/b Bitty Blossoms, then wiped some gold paint over the petals to add some more shimmer.


To finish I added a blue and gold bow to the ribbon 'keeper' for the bookmark,


and a gold and blue tassel - I kept the tassel small so it would not mark the book pages, and where I attached it, I had already hidden a metal eyelet behind a small aperture in tip of the die cut.


The final detail was the gold embossed sentiment.

I am linking this to:

(It turned into a bookmark)

Thank you for taking the time to visit my blog - may your day be blessed.
Any comments you may leave are deeply appreciated.
All comments are moderated and spam deleted.

Friday, August 19, 2016

Silver Butterflies

Welcome

I saw a tutorial online a week or so back on making a matching layer to go behind a featured layer, using the same embossing powder on both layers.  And now, don't you know it, I can't remember where, or who, it was to be able to acknowledge them - all I can recall is that it was made by a it was a man, and no, not the great Tim Holtz.


I started with the butterfly stamps, (now unavailable), randomly stamping them over the black panel with embossing ink, and then silver embossing them. 


The next layer then had embossing ink swiped around the edges, and again it was embossed with the same silver embossing powder.


The finishing details on both of these cards were the silver embossed sentiments, double layered on white cardstock and layered over a silver edged white ribbon.


and sequins, silver on the thanks card, coloured on the birthday card.

I am linking these to 

(Dies are Spellbinders oval and scalloped ovals)

Thank you for taking time to visit my blog - may your day be blessed
Any comments you may leave are deeply appreciated
All comments are moderated and spam deleted

Wednesday, August 17, 2016

Sparkly Flowers and Scripture

Welcome

I recently wanted to encourage a couple who had received some difficult news, and this is the result.
The colours, and papers with the garden theme, were very specifically chosen for this couple.


The scripture stamp is from Our Daily Bread Designs, Grace's Strength set, and was embossed in gold on white - I did try it on the green, but it did not stamp or emboss well as the card was lightly textured.


I then die cut the next two layers with dies from the ODBD Filigree Frames  Die Set, stippling Delcata Gold ink onto the dark green before removing the die. The lower layer is a soft gold paper, although it shows tan here.


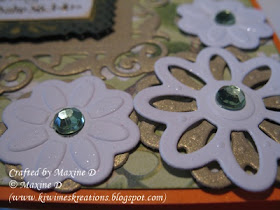
I then cut some flowers from the S/B Floral Doily Accent set in the gold and the white card and layered them on to the base, adding a green rhinestone in the centre.


The final details were some rhinestones scattered on the Kaisercraft Botanica paper, and some WOS on the petals of the flowers.

I am linking this to:
(rhinestones, die cuts and flowers)


Thank you for taking the time to visit my blog - may your day be blessed
Any comments you may leave are deeply appreciated
All comments are moderated and spam deleted

Monday, August 15, 2016

Something Fishy

Welcome

I had fun playing in the studio the other afternoon, and experimenting with my Magicals - both powders and sprays. Although the finish looks matt in this photograph, there is a lot of mica and shine on the background layer.


I started by sprinkling the powders onto the watercolour paper and spraying it, then sprinkling on more powder - it was fascinating watching all the colours 
emerge.


Then came a quick 'blat' with some coordinating colours of spray I purchased in July at the Stamp Expo.  


Next was a brand new MB Large Ringlets die cut, using white card, and then sprayed with silver shimmer spray. The fish was silver embossed and painted with iridescent blue Twinkling H2O's.


I added the silver embossed sentiment onto a circle die cut, edged it with a white signo pen, and sponged all edges with dark blue ink.  The main panel was also embossed with a Lawn Fawn Stitched Borders die on the edges

I am linking this to:


Thank you for taking the time to visit my blog - may your day be blessed.
Any comments you may leave are deeply appreciated.
All comments are moderated and spam deleted

Saturday, August 13, 2016

Shattered Glass Hearts

Welcome

I used this card to teach the Shattered Glass technique in my class this month.


I started with two chipboard heart shaped die cuts. My original inspiration came from Karen Hasheck and her Tarnished Silver Look Embossing.  


I did not have any black embossing powder, so after doing a base coat of copper (rather than silver) embossing, I used clear embossing powder (several coats as I do not have any clear UTEE), and on one of the last coats I added just a sprinkle of blue to imitate verdigris on the copper.   

 
A tip that makes life easier - heat the layers of embossing powder from underneath, even when using versamark, it saves the powder blowing off when you have a thick layer !!
The 'shattered' look was achieved by simply bending the chipboard after it had cooled.


The feature panel was cut using a MB stitched rectangle, the edges sponged with espresso ink, the hearts from a Inspired Stamps set, and the sentiment by Montarga Stamps were embossed with Copper EP, before adding the larger heart.

The feature panel was then mounted over some wall paper, then onto the blue base.


On the second card that I made during the class I angled the panel and partially placed it over the ribbon for a more relaxed look.

I am linking this to:


Thank you for visiting my blog - may your day be blessed
Any comments you may leave are deeply appreciated
All comments are moderated and spam deleted.

Thursday, August 11, 2016

Natural Sympathy

Welcome

I know I have not been around a lot of late, I have missed blogging but there has been a lot going on IRL, as well as some computer issues, i.e. an external hard drive not co-operating.


This card was made using a gray card base, and a layer of a blue shiny card


(I'm not sure what happened here to give such a deep blue background...)

with a S/B die cut of Cat tails.  I took then as being wheat heads, and coloured them accordingly.


The sentiment was clear embossed over versamark ink.


The final detail was this beautiful sparkling ric rac over some washi tape.

I am linking this to:

(Die used was S/B Cat tails)

Thank you for visiting my blog - may your day be blessed
Any comments you may leave are deeply appreciated
All comments are moderated and spam deleted

Friday, August 5, 2016

Starry Baby Blue

Welcome

This is another card using the liquid pearls as a background on the feature panel


I started with a piece of (re-cycled) glossy card - I wanted a blue background, but have no blue liquid pearls, so rubbed some Faded Denim DI onto the panel before putting on the white liquid pearls.  Because the card was glossy, the ink did not dry and I have a fabulous blue background!  I later added dabs of light green and gold liquid pearls, but did not rub them into the background.


The main image was from a new set of stamps (bought at the big fair at the beginning of July) called Party Paws Baby Bamboo By Crafter's Companion. Unfortunately I cannot find a link for you. It was coloured with prismacolor pencils and fussy cut.  The edges that went off the base were held up with some foam tape.


Both sentiments were stamped with Versamark and Faded Denim inks and then clear embossed.  The word baby was four separate stamps, and took me a while to line up using my MISTI.  I filled the letters using a silver Signo pen.


The edge was die cut with an edgabilities die, sponged and then had the pearls adhered.


The final details were a few gold stars adhered, and a strip of the background paper added to the inside to help highlight the border.

I am linking this to:

Thank you for visiting my blog - may your day be blessed
Any comments you may leave are deeply appreciated
All comments are moderated and spam deleted.