Pages

Monday, July 31, 2023

Pink, Blue and a Shaker

Welcome

This was made back in May, so I am not 100% certain of all that I used... 


I know I started with a 'mop up' background, and the die cut had been cut ages ago, and then sat on my desk before I put it to use...  here I glued it to the acetate on this shaker card, which lifts it off the background and lets it take the eye.


I dabbed ink onto the die cut to colour it - I am sure the pink is a Memento Pearlescent, but cannot remember which green I used.


I created a similar piece of card for the sentiment, the sentiment is a magazine freebie
The sequins were from several assortments, with blues and pinks, as well as some neutral colours


The inner liner I stamped off the corner with the same pink ink, using one of my original stamps... 


It is a very pretty rose, but I need to have a mouse pad under it to get a good impression.

I am linking this to:


Friday, July 28, 2023

Technique Trio

Welcome

Today's three cards started as I taught this technique to my class, and then came home and 'finished' the demo one, and two others I had kitted, but were not used... 
This is another technique by Natasha Foote, found here.  It is quite simple, but very effective!


I added a variation to each card - in this one I used a 'frame' I had on my desk, cut out to form a negative frame on another card.


I also made mine to a portrait orientation, rather than landscape, as my only alphabet dies are quite small, and this gave a better proportion


On the second card I trimmed around the 'birthday' stamped sentiment
I used the same ink as the background for my stamping


The edges were finished in the main colour, by masking off a narrow border and inking.


The inside was finished with three wee flowers, to echo the embossing


Finally a  distinctly masculine make with the brown colourway and geometric embossing


Finished with some metallic copper washi tape.

I have chosen not to link up to any challenges as all three are similar. 


Sunday, July 23, 2023

Fuzzy Wild Daisies

Welcome
Thank you for taking the time to visit.

I would like to give a shout out to my newest follower, a fellow 'Kiwi' , Julie of My Threadbear Life
Do pop over and see her wonderful crafty adventures on her blog

I wanted to use this Wild Daisies Stamp by Picket Fence.  it is a large stamp, much larger than the A4 cards I generally make, so I stamped it 'off the edge' for this card, and heat embossed it with silver onto a piece of card I had pounced onto wet, surplus inks on my work surface


I used a brush to lightly and slightly messily, 'colour' the images


There were a few 'oops' while colouring this, hence the butterfly embellishments... they were punched from glitter tape adhered to card, to match the glitter boarder across the bottom of the card


I also used the same tape inside the card. 

I am linking this to:

(Show something hot - mine was heat embossing)


Friday, July 21, 2023

Spotlight Canoe

Welcome
Thank you for taking the time to visit.

At a recent card class I taught the Spotlight technique, taking it one step further by inserting the cut out coloured image into an uncoloured version of the stamp.
Both images were stamped using the MISTI,  not moving the stamp between stamping, then after colouring one image, lining them up together and die cutting the 'spotlight'  in one pass.


The stamp is a classic one from Divinity Designs, With Deepest Sympathy  
When I came to complete this card with the image, it was very uncooperative.' Firstly the 
the sentiment blurred, so I trimmed the panel down and decided to mount it on a landscape orientation, and framed it with a doodled frame... round one to me


It looked very stark, and I could not think of a sentiment... So I tied some twine around the 'blank' end, and decided on this mini stamp, but could not find my tiny tag set of dies, so improvised with a CUTplorations mug, leaving off the steam.. round two to me!


I sponged some Pear Tart Memento ink around the edges to soften it against the green background, and attached it to the twine with some copper metallic thread. 


The gingham washi was a 'blue' green, so I layered a a bright lime green tape behind it, and got a very pleasing result to finish the inside of the card.  Final round to me!!


I stamped the envelope with the trees from the main stamp, using the edges of the stamp, and taking it 'off the edge' of the envelope.  I used Memento London Fog ink for my stamping of the images.

I am linking this to:


Tuesday, July 18, 2023

Only Flowers

Welcome.
 Thank you for taking the time to visit.

Today's card is for the mid-month inspiration for We Love Stamping July Challenge


I started with a Hero Arts background stamp - Bold Prints, Flowers and Swirls, and white embossed it onto the white card base, I then loosely painted it with water colour paints.


Added the sentiment (a magazine freebie) after embossing in white on black card,
And mounted that over some silver ribbon - I also used the ribbon down one side of the panel


I chose a simple finish with the ribbon and a few pale blue sequins, as I wanted the stamp to take centre stage.  The focal panel was mounted on black, and then a blue card base.


I added a strip of the background to the inside of the card.

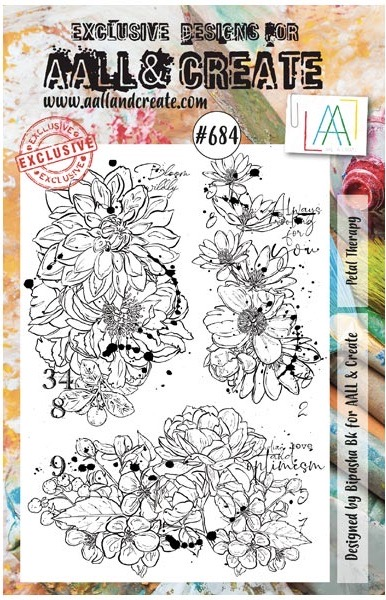
Our prizes this month are these beautiful florals from Aall & Create


I am linking this to:


Sunday, July 16, 2023

Illusionary Doodles

Welcome, 
and thank you for taking the time to call in.
It's been wet and cold here this past week, but I have not been able to do very much cardmaking, thanks to an ongoing sinus infection - I have spent hours knitting though...

This was made at the beginning of the month for my small New Zealand swap group, where the challenge was to use this Optical Illusion technique.
I must confess that I had seen this video, and decided this was not for me, but I had to eat humble pie and make it for the challenge.  


I started out making the doodled panel, but I did a full sized card front, and then halved it when I had finished it.  I added a red layer before adding it to my card front.


I stamped the wee sentiment in black, and layered the hand cut tag over the same red card, despite how it looks, before mounting it with some red ribbon threaded through the top. 


I finished the inside of the card with a trimming of the doodled panel.  Both that, and the layer of white card I ran over a red ink pad to give them some definition.
I was pleased with the results, despite my initial reservations :)

I am linking this to:


Wednesday, July 12, 2023

Papillons

Welcome

Thank you for taking the time to visit.
I enjoyed 'playing' with this stamp and technique, and loved the outcome.
I first stamped the image, part of the Phenomenal Butterfly stamp by Chocolate Baroque, in Versa Mark ink, then brushed copper Perfect Pearls over it


I loved the background it formed, but, there was an oops in the middle...


So I cut an oval in the centre, lined it up so I could position the sentiment stamp on the card base, stamped and embossed it in copper ep., then cut a butterfly from a copper coloured glitter card to fill the oval


The feature panel was mounted over the coloured base card  - the above photo gives some idea of the shimmer of the perfect pearls


The inside had a verse stamped in brown ink on the left side, and the right side left blank.

I am linking this to:


Monday, July 10, 2023

Comfortable

Welcome, 
and thank you for taking the time to visit.

A special  welcome also to my newest follower, Birgit Angermann.

This card was made for the 53rd Wedding Anniversary of a family couple


The image is from Montarga, (a New Zealand firm) called Couple on Bench

I embossed it using platinum ep, and watercoloured it


The sentiment, a magazine freebie, was also platinum embossed


I placed the complete panel onto the green background, and thought it too stark, so die cut a negative frame - I was so pleased with the result.


The inside had a strip of green washi tape in a leaf pattern - a tribute to the wife's love of gardening.
The envelope also had the washi tape on it.  

I am linking this to:


Saturday, July 8, 2023

Another Fishy Situation...

Welcome, 
thank you for taking time to come and visit.

This card started with a background I made with a Picket Fence stencil, Knots., and it was calling me to use it.... 


I decided on the fishing theme as the recipient loves freshwater fishing, so my wonderful old fish stamp, (one of my originals, and it's still available) came out, and I stamped and silver embossed it on vellum, then coloured it on the reverse, including giving it some 'water' to swim in.  I then die cut the vellum into an oval.


The sentiment was an Hero Arts die and stamp set, (Happy Thanks). I layered the happy in silver on white to make it stand out


Unfortunately the birthday doesn't show up well in the photos, but it was more noticeable IRL.


The finishing details on the front panel were water drops of Glossy Accents.
When I mounted the main panel, I added some snippets of the silver under opposite corners


The inside was finished with some silver spotted washi tape.

I am linking this to: